More Instructions
Join Our Community
Get The Latest Updates
Subscribe To Our Weekly Newsletter
No spam, notifications only about new products, updates.
SERWALL® Official Store: Free delivery in the contiguous US. Quick Ship items ship in 5-7 business days!
SERWALL® Official Store: Free delivery in the contiguous US.
Thank you for purchasing Serwall furniture. We have planned that assembly is a quick and straightforward process with our explicit instruction below so that you can assemble your furniture quickly – even after you have moved to a new home.
Please make sure that all parts (as follows) have been delivered without any damages.
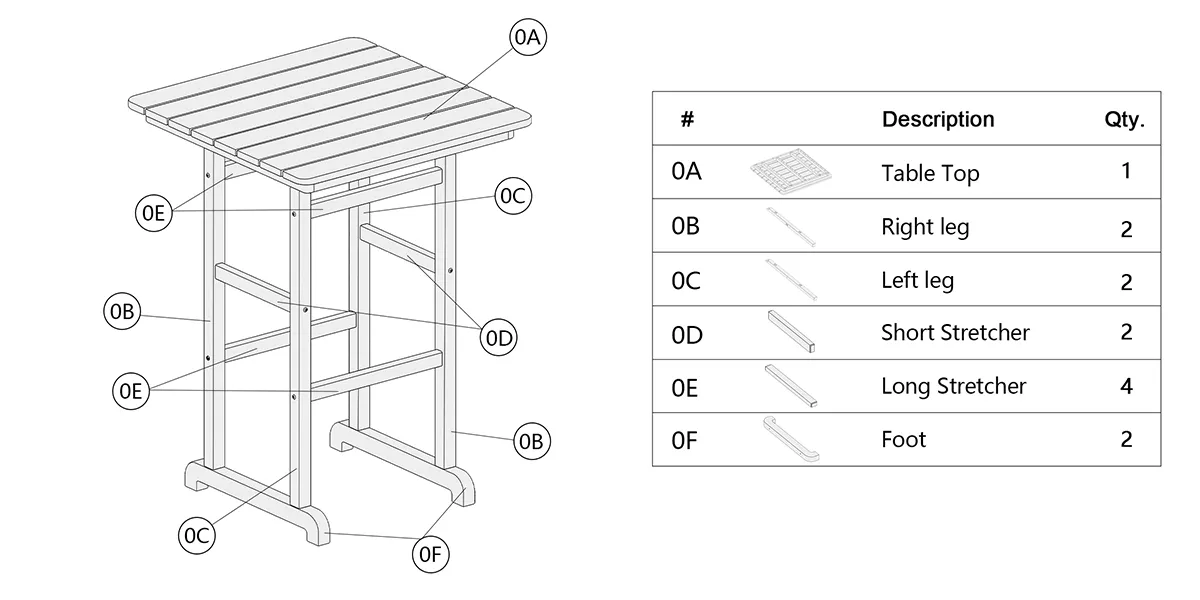
Be sure check all packing material carefully for small parts that may have come loose inside the carton during shipment.
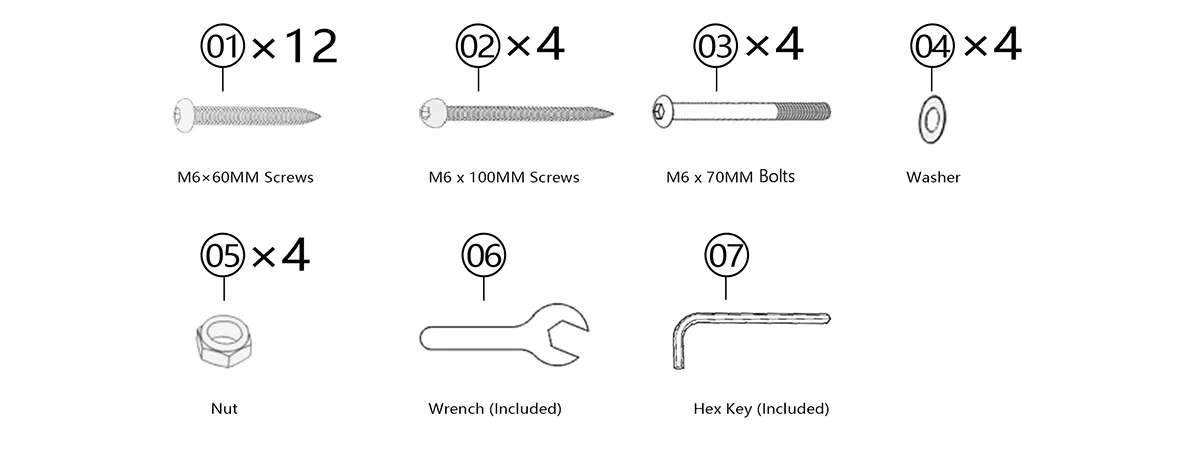
Missing anything? No worries, submit a request about your missing parts, we will solve your problem in no time.
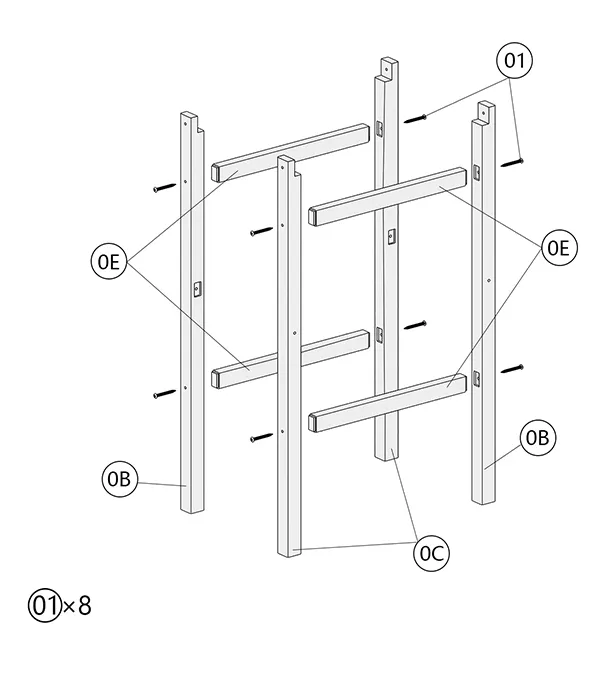
Step 1
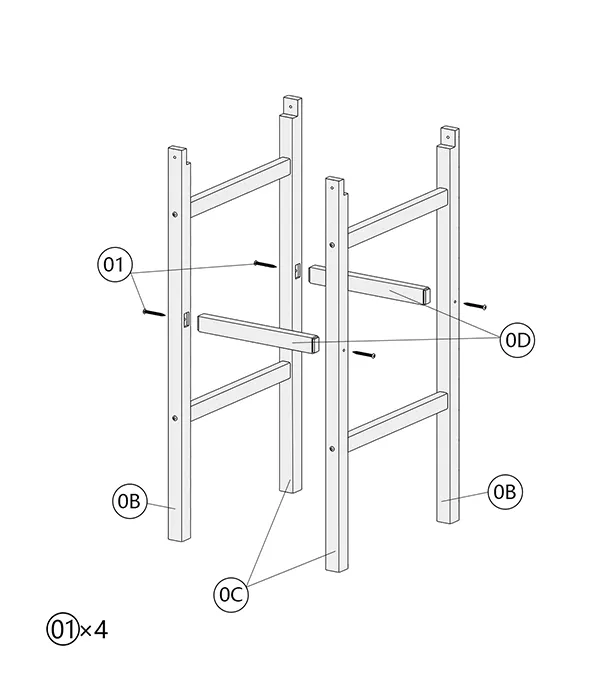
Step 2
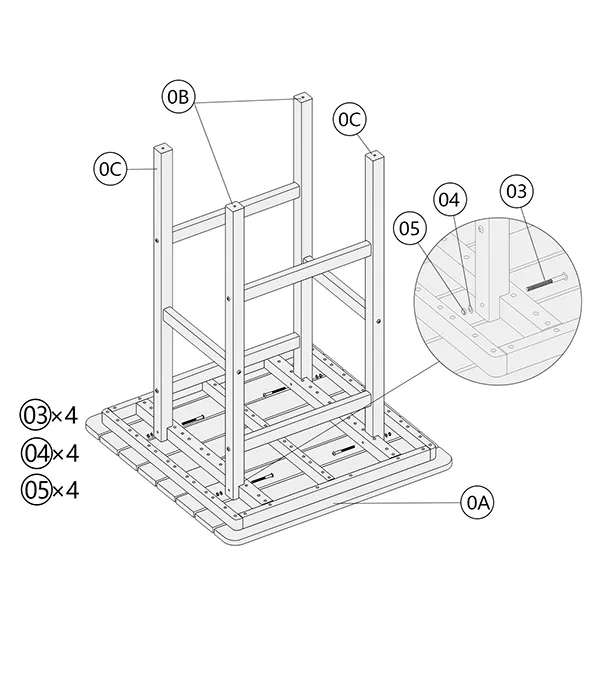
Step 3
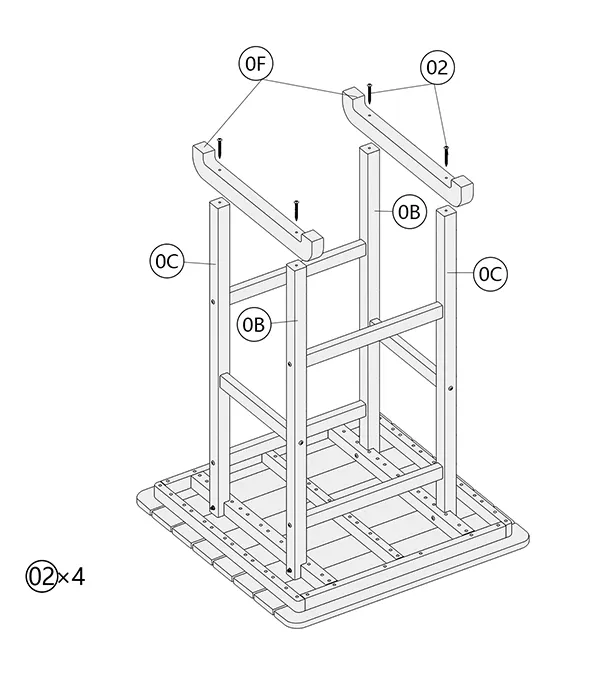
Step 4
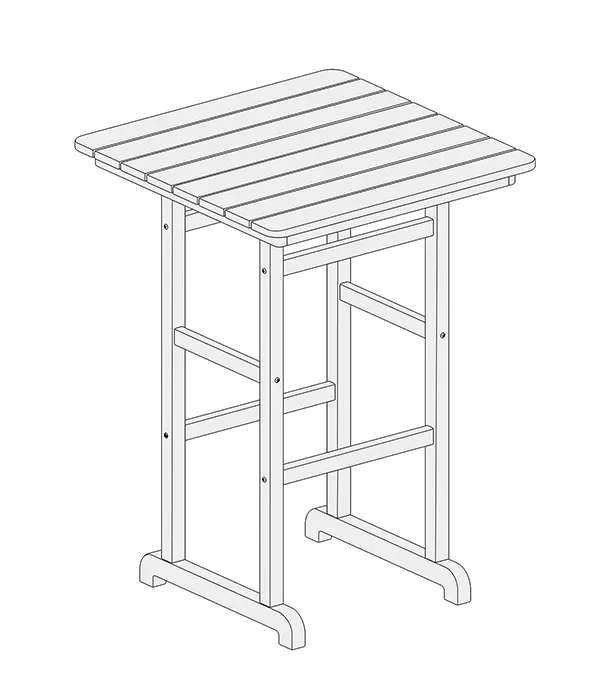
Step 5
Screws, bolts, nuts, and wooden plugs may loosen up during regular use every day. They should be periodically inspected and re-tightened to prevent damage to the furniture and (or) personal property or cause injury. Always check to ensure all hardware and the components mentioned above are attached to the furniture properly and kept tightened at all times.
Get The Latest Updates
No spam, notifications only about new products, updates.