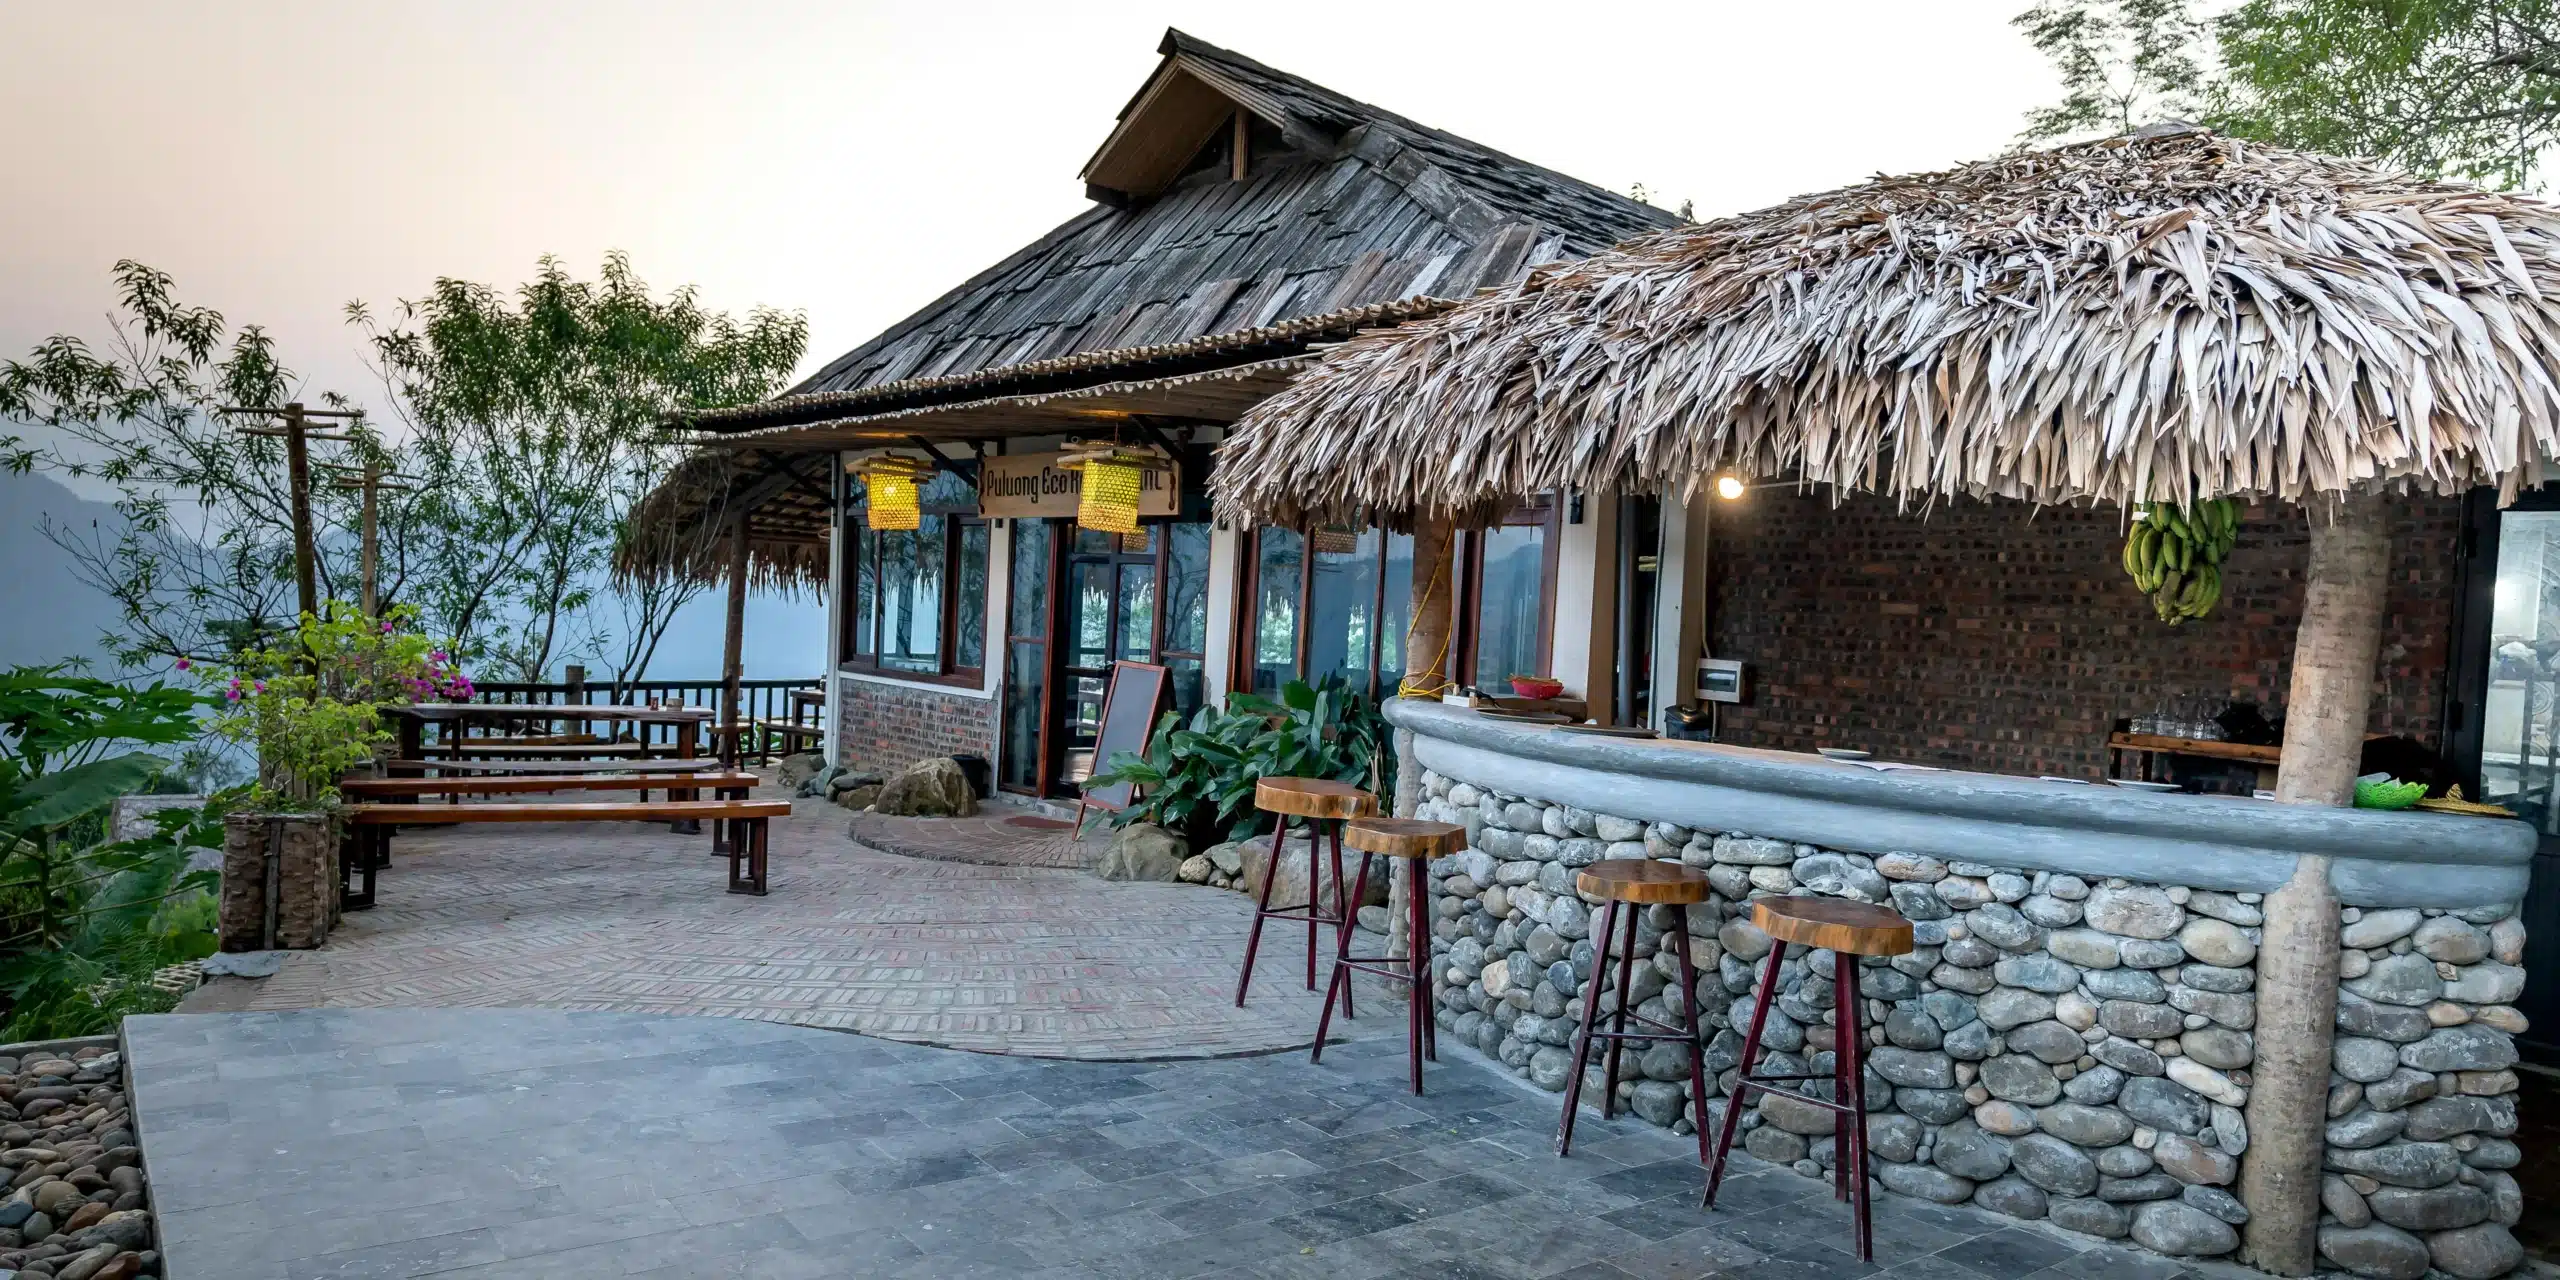
Nothing is better for a summer party than a stylish outdoor bar. Whether you’re hosting an outdoor barbecue or a summer cocktail party, it is the ideal space. Use your craftsman spirit to build an outdoor bar that fits your patio style and turn your backyard into the ultimate summer gathering place. How to build a outdoor bar? We’ve prepared a detailed tool list and DIY steps. Follow the article to begin your DIY journey.
Planning and Material Preparation
Before starting to build an outdoor bar, we need to do some preparation.Here are some details:
Determine Outdoor Bar Size
How big do you want your outdoor bar to be? This is the first thing to consider when building a bar. You may determine the size of the bar based on the available space in your backyard or patio and the number of guests you will have. Remember to leave enough space around the bar for people to move around and add seating.
Normally, the standard size of an outdoor bar is 48 inches (120 cm) in length, 15 inches (38 cm) in width, and 50 inches (130 cm) in height. In this article, we will introduce the materials and DIY steps required based on this size.
Need Materials and Tools
After determining the bar size, what materials and tools do we need to prepare? Here’s the list:
1. Lumber and Parts List:
Qty 4: 48″*4″*2″ wood boards(L × W × H)
Qty 6: 15″*4″*2″ wood boards
Qty 4: 50″*4″*2″ wood boards
Qty 4: 50″*6″*2″ wood boards
Qty 1: 49″*16″*2″ wood boards
Qty 18: 18″*4″*1″ wood Slats
Qty 13: 50″*4″*1″ wood slats
Qty 3: 40″*4″*1″ wood slats
Qty 4: 49″*4″*1″ wood slats
Qty 30: 2.5″ long wood screws
Qty 76: 1.25″ long wood screws
2. Tool List:
Waterproof paint
Brush
Exterior wood paint
Gloves
Electric screwdriver
120 to 220 grit sandpaper
Full Steps for Building an Outdoor Bar
Get your crafting materials and tools ready. Follow our guide to start building your outdoor bar.
Step 1: Constructing Bar Base Frame
The first step in building a bar is to construct a sturdy base. Lay 2 48″*4″*2″ (L*W*H) long wooden boards and 2 15″*4″*2″ short wooden boards on the ground for the base. Place the short wooden boards on the inner end of the long wooden boards and join them together to form a rectangle. Use an electric screwdriver to drill 4 2.5″ long wood screws at the joints to reinforce the rectangle.
Repeat the above steps to create another tabletop base. In this way, the 2 bases required for the bar are built.
Step 2: Install Leg Panels
After preparing the base, we need to prepare some wooden boards of different widths to make the table legs. Grab a 48″*4″*2″ (L*W*H) wooden board and place the two rectangular bases parallel to the each other at both ends of the board. Then drill two 2.5″ long wood screws into the overlapping part of the board to reinforce it. Repeat this step to install the support boards on the other three sides of the base. In this way, we have completed a simple bar frame.
To make the bar more solid, we can use 4 wider wooden boards to make the legs. Stand up the bar frame and place 1 50″*6″*2″ leg panel into the opening of the support board. Make sure the support board and the leg panel form a 90-degree angle with the rectangular corner. Then use 2 2.5-inch wood screws to fix the leg panel to the top and bottom of the base. Repeat this step to make the remaining 3 legs, and a solid bar frame is completed.
Step 3: Assemble Base Slats
Now that the frame is ready, start filling it with slats. Prepare 12 18″*4″*1″ slats (L*W*H) to fill the bar base. Place the bottom of the bar frame down and vertically. Grab an 18″*4″*1″ slat parallel to the short side of the frame and place it in the bar base to fill it. Then, repeat the process by placing parallel slats next to it until the base is filled. Use 2 1.25″ wood screws to fix each slat at the intersections on both sides of the frame. This will give you a complete bar base.
Step 4: Build Bar Sides and Front
Now that the bottom is filled, it’s time to fill the sides and front. Place a 50″*4″*1″ slatted wood board against the short side of the base and flush with the edge of the frame. Drill two 1.25″ wood screws into the overlap between the slats and the base to secure ito the frame. Continue installing the slats until the side frame is completely covered. Repeat this step to fill the other side of the bar.
Leave one of the sides of the bar empty for easy access. Continue filling the front of the bar using the side slats. Place the slate on the far left side of the frame and align it with the edge. Drive two 1.25″ wood screws through the top and bottom of the slat to secure it. Continue adding slats until the front frame is filled. It usually takes about 18 slats to fill the entire front.
Step 5: Install Center Partition Wall
Install the partition wall and plan your bar 1 space properly. Place a 15″*4″*2″ wooden board in the center of the top frame and fix it with screws. Then, fix a shorter wooden board parallel to the top board on the bottom slats to form a support frame. Place 3 40″*4″*1″ slats on the support frame and secure both the top and bottom sides with 1.25″ wood screws. In this way, a complete partition wall is completed.
Step 6: Assemble Built-in Shelves
Add internal partitions to store items, such as wine glasses, water glasses, etc.First, nail some thin wooden boards to the inner sides of the bar and the partition wall to create a surface for placing slats. Make sure the thin boards are aligned parallel to ensure the shelf is stable enough.
Then, place a 18″*4″*1″ slat on the surface and fix it to both ends of the flat surface with 1.25-inch wood screws. Repeat this process until the flat surface is filled and a complete partition is formed.
Step 7: Make Bar Tabletop
To ensure a vertical tabletop, the width and length of the tabletop needs to be 1-3 inches longer than the frame. For example, a 48″ * 15″ * 50″ bar requires a 49″ * 16″ * 2″ wooden board as the tabletop.Drill four 2.5″ wood screws at the four corners of the frame to initially fix the tabletop. Then drill a wood screw into the tabletop every 10-20 cm for further reinforcement.
Step 8: Install Tabletop Slats
The wooden tabletop is too rough, so you can beautify it by adding slats. Prepare 4 49″*4″*1″ slats and lay them horizontally on the tabletop. Make sure the first slat is flush with the two ends and sides of the tabletop. Then use 1.25-inch wood screws to drill holes on both sides of the slats to reinforce them in turn. In this way, we can get a personalized tabletop.
Step 9: Waterproof and Paint
So far, congratulations on completing all the steps of making the bar frame. In order to make the bar more durable and beautiful, we need to give it some coating treatment.First, carefully sand every surface and corner of the bar with 120 to 220 grit sandpaper, then apply waterproof paint to waterproof the bar.
After the waterproof paint is completely dry, you can use a brush to apply colorful Exterior wood paint to personalize the appearance of the bar. To ensure uniform color, you can apply several layers repeatedly to achieve the best effect. Please note that you need to wear gloves throughout the process to prevent allergies.
Decorate an Outdoor Bar for Summer Party
Think your DIY bar is too plain? Adding some fun decorations to make it more summer-like. Here are some creative decoration ideas:
- Add outdoor bar stools: Place outdoor bar stools of similar height around the bar to further improve the function of the bar. It’s a great choice for sitting down, drinking and chatting with friends or family.
- Hang string lights: Hang string lights around the bar to create a dreamy atmosphere for the summer parties.
- Add an ice bucket: Place an ice bucket at the base of the bar to further enhance its functionality and festive vibe, keeping drinks and beverages cool at all times.
- Install a patio umbrella:Use patio umbrellas to provide shade for your bar and seating area. Choose brightly colored or patterned umbrellas to add a cheerful pop of color to your outdoor bar.
Final Thoughts
How to Build a Outdoor Bar? This article provides you with a comprehensive step-by-step guide, from material preparation to detailed DIY steps. In addition, we share several creative decoration ideas, such as adding string lights and bar stools. With these clear guides and tips, you can build a durable and stylish outdoor bar that becomes the centerpiece of your summer parties. If you find DIY too complicated, consider shopping for Serwall outdoor bar furniture to quickly start summer party life.