When you get your Adirondack chairs out again, ready to enjoy the outdoors, do you notice they are not as sturdy and vibrant as they once were? Prolonged exposure to the elements has roughened their surface, flaking the paint, fading the color, and diminishing their original luster.
How to refinish adirondack chairs? You can get them back as good as new in just 5 steps. In this guide, we have prepared a detailed list of materials and step-by-step instructions for you. Read on to start your restoration journey.
Tools and Materials Needed
- Brush
- Mild soapy water (or specialized wood cleaner)
- New slats or wood filler (if needed)
- Screwdriver
- Sandpaper (medium grit: 80; fine grit: 220) and an electric sander
- Paint (or spray paint cans), brush (or roller)
- Sealer (or varnish)
- Vacuum, tack cloth (or damp cloth)
- Drop cloth (or plastic sheet)
- Gloves, safety goggles, and a mask
How to Refinish Your Wooden Adirondack Chairs
Step 1. Repair and Clean
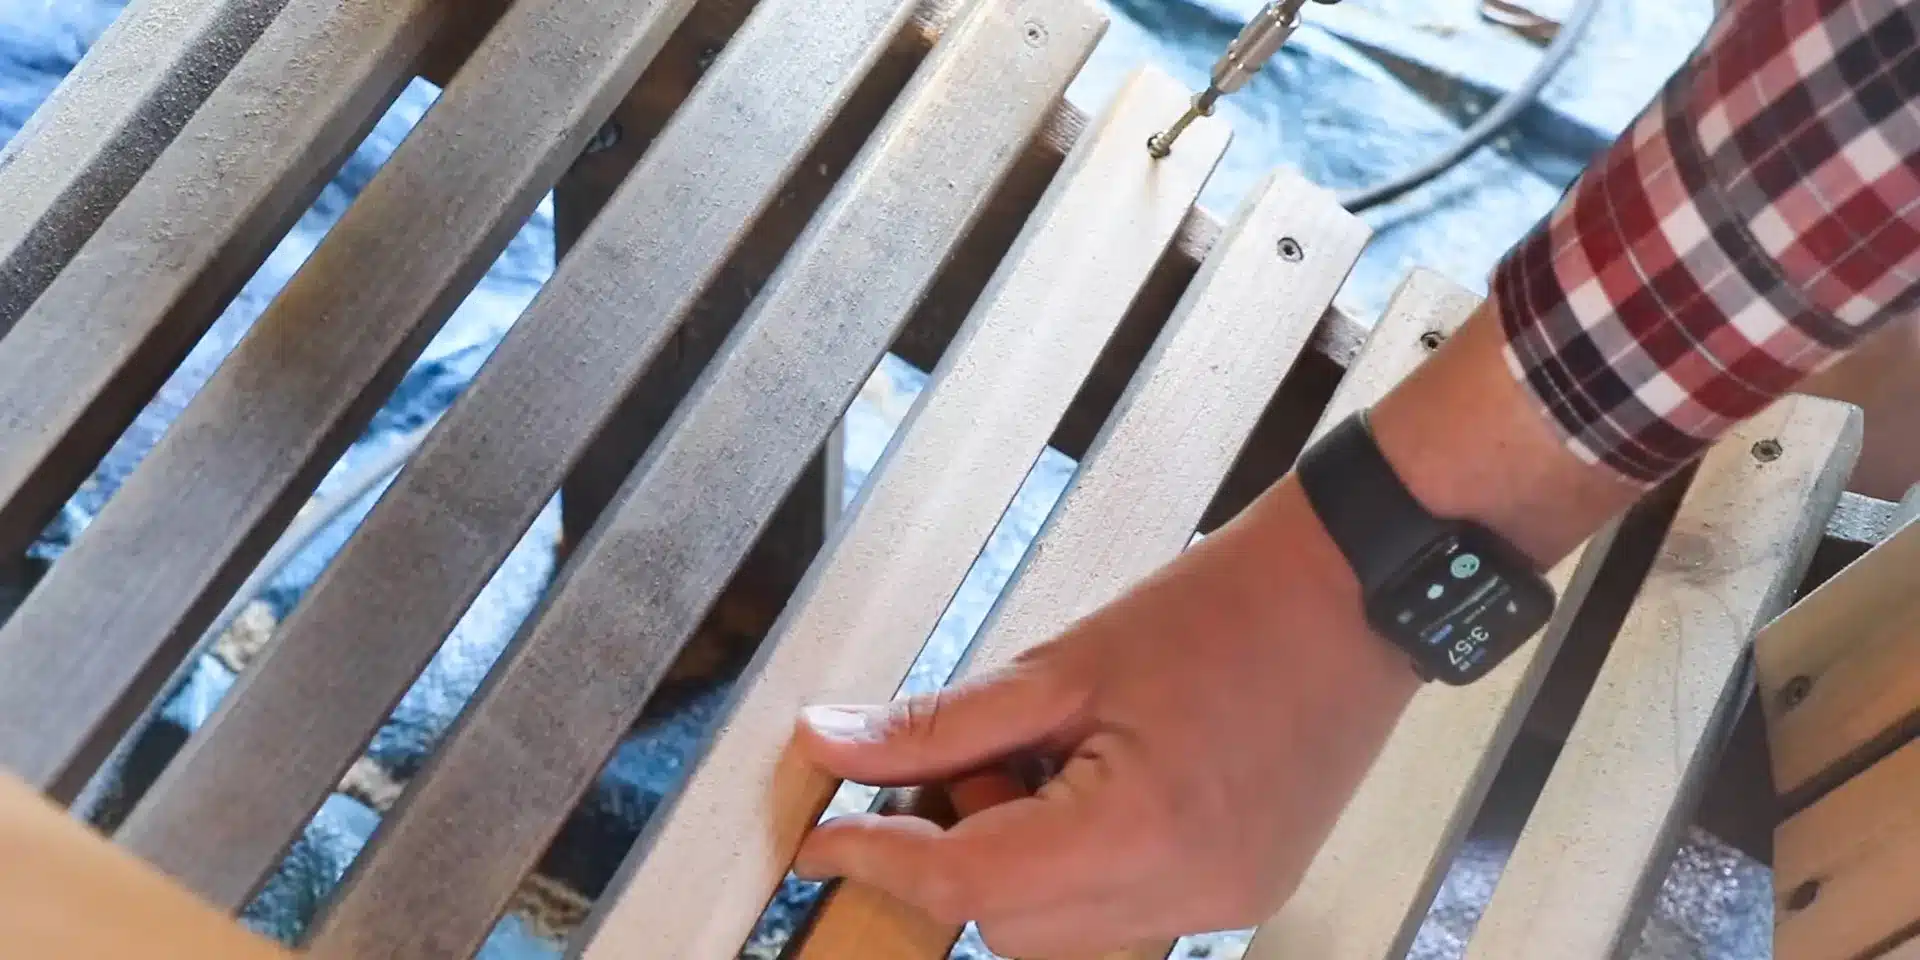
First, check the chair slats for dents, bends, cracks, or missing pieces. Minor damage can be repaired with wood filler, while severely damaged or missing slats should be replaced directly. Next, check whether all hardware parts are protruding or loose. If so, use a hammer to flatten them out and replace rusted screws to ensure the chair surface is smooth and the overall structure is stable.
Once repaired, remove dust and leaves from the surface of the chair, then scrub it with mild soapy water or wood cleaner and finally dry it thoroughly.
Step 2. Sanding
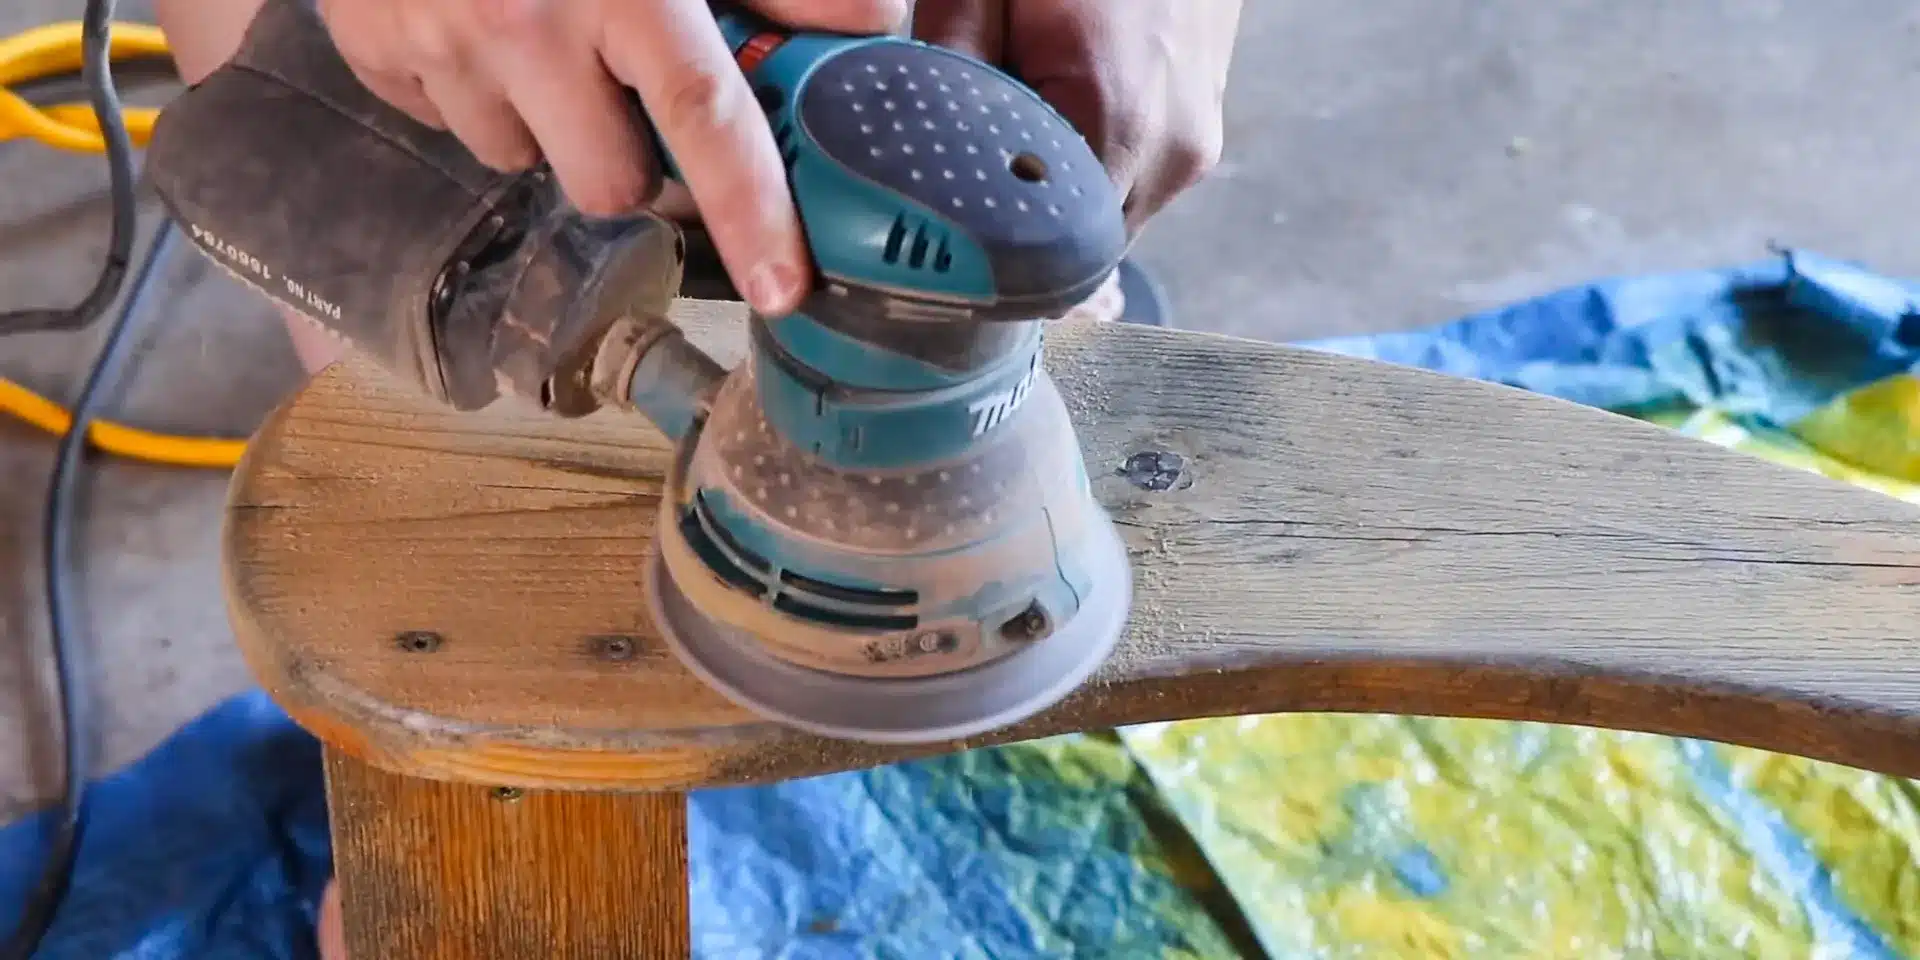
Before sanding, it is recommended to choose a well-ventilated and spacious environment, which will minimize dust accumulation. Also, wear protective gloves, goggles and a mask to ensure safety.
For the first sanding, use 80-grit sandpaper to remove old paint and surface imperfections. Then, use 220-grit sandpaper for a second sanding to provide better adhesion for subsequent coats. An electric sander is recommended to clean the surface faster and more evenly. When sanding, sand in the direction of the wood grain, avoiding crosswise or circular sanding that may leave scratches.
Step 3. Removing Dust
Use a vacuum cleaner to remove dust from the chair’s surface, paying special attention to the crevices. Then, use a tack cloth to gently wipe away any remaining dust particles. If using a damp cloth, be sure to dry completely before painting.
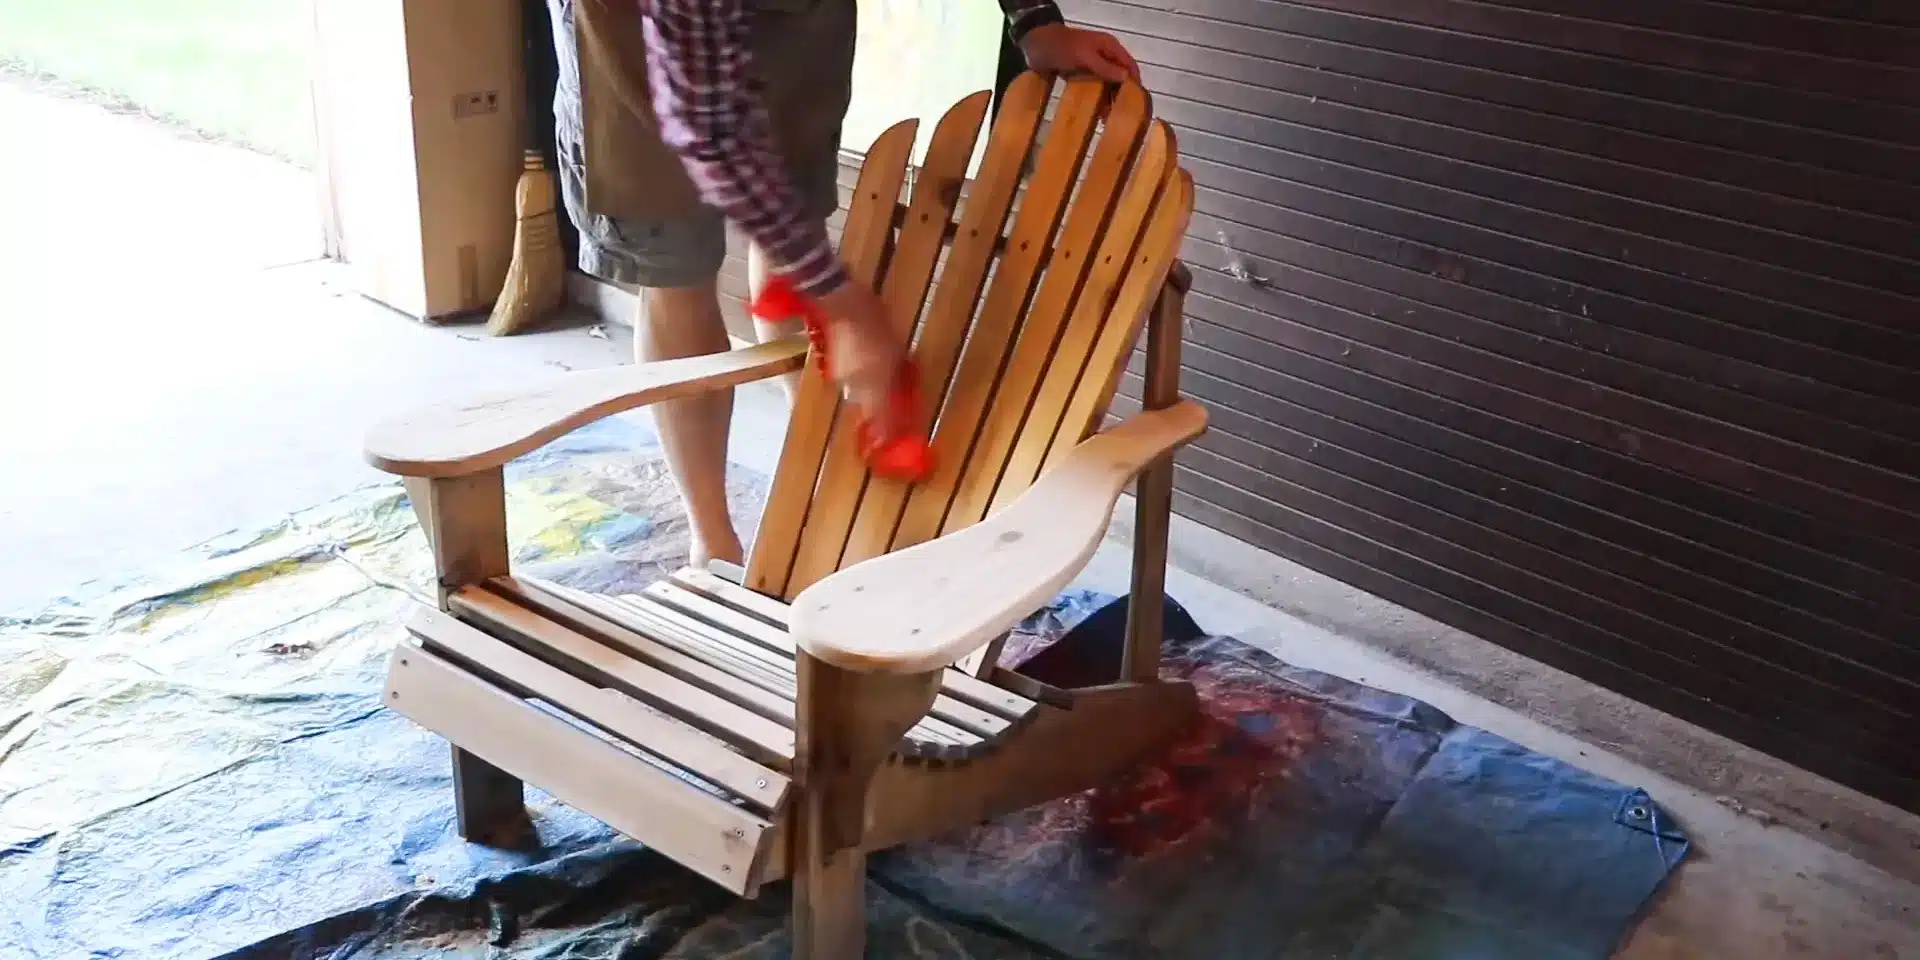
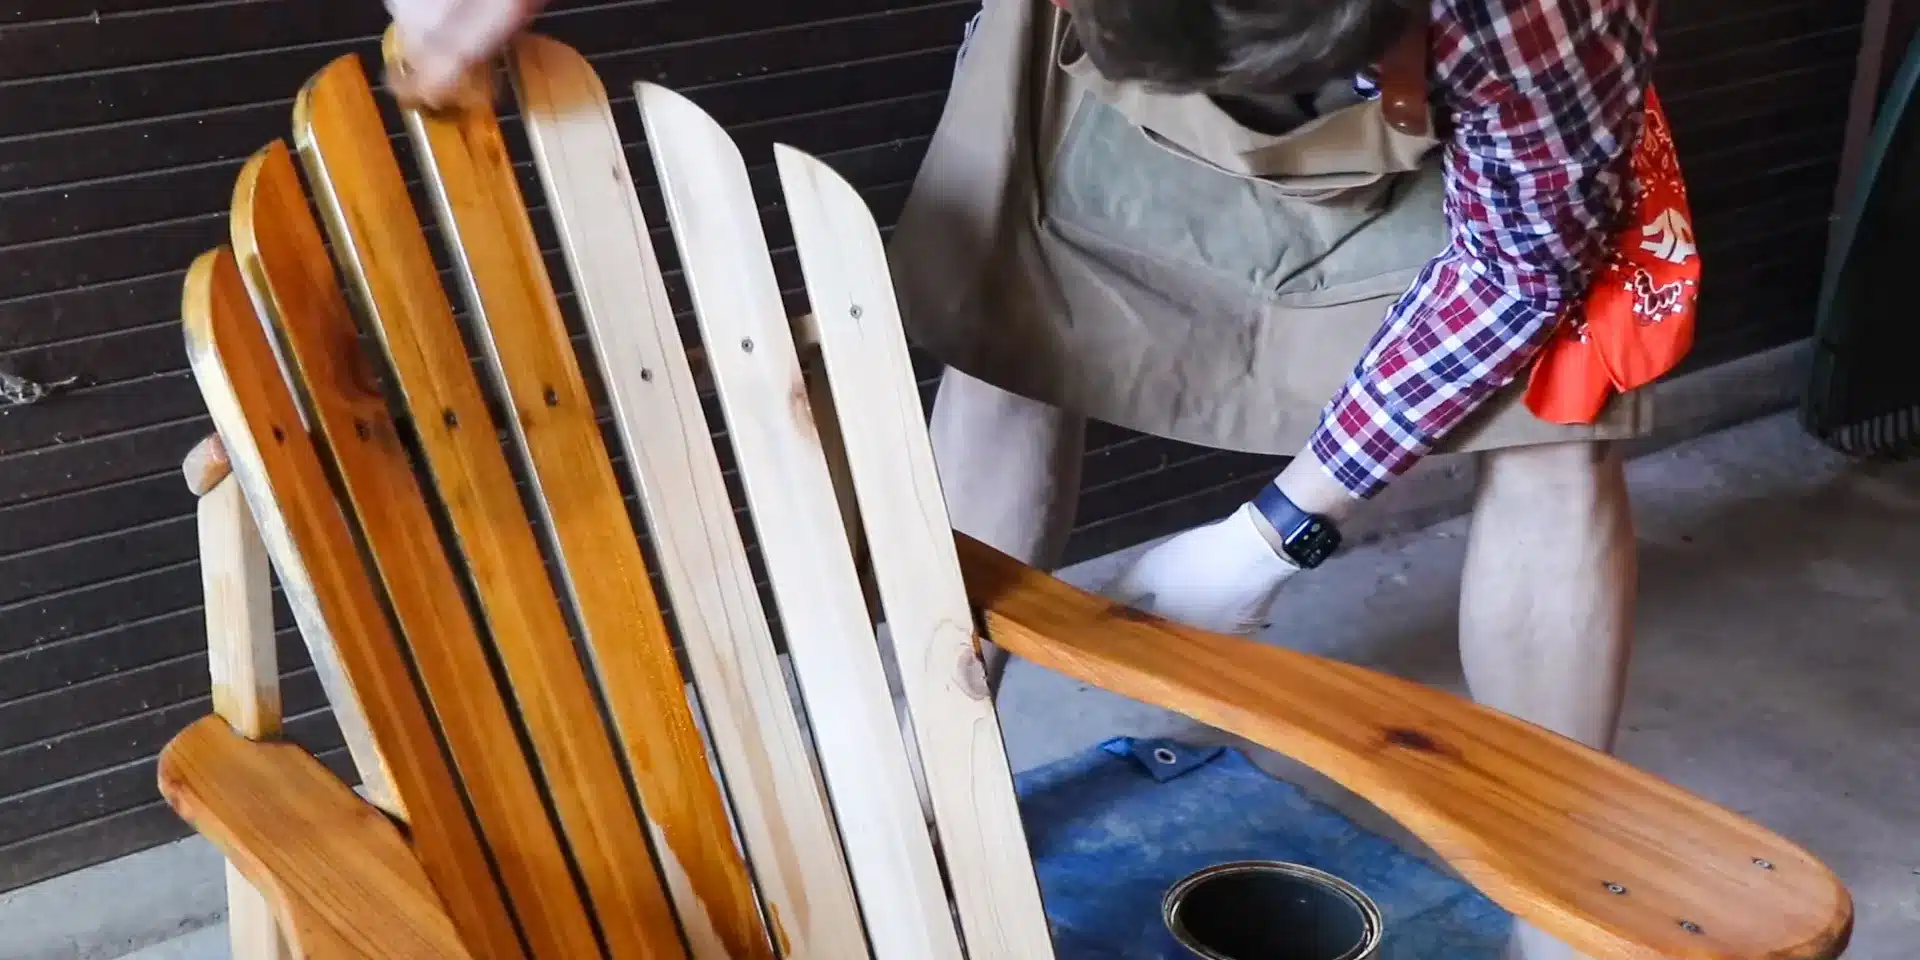
Step 4. Painting
To avoid paint dripping, lay a drop cloth or plastic sheet on the floor before starting to paint, and always ensure that the work area is well ventilated. Brushes and rollers are good tools for painting, If using a spray can, keep a distance of 10-12 inches when spraying.
It is generally recommended to apply two coats of color, with each applied thinly to ensure even color and a smooth finish. Make sure the first coat is completely dry before applying the second coat (usually takes 2-4 hours, or wait longer according to paint instructions).
Step 5. Sealing
In order to keep the chairs better looking and durable, next we have to apply a sealer. Choose a sealer suitable for outdoor wood, such as polyurethane varnish or wood wax oil. They are both effective against moisture and UV rays, extending the life of the chair. When applying the sealer, the same method of multiple thin coats can be used. After each coat, wait for complete drying before applying the next coat for optimal protection.
If you need a more visual guide, check out the YouTube video below.
Final Thoughts
FAQS
How long does it take to refinish an Adirondack chair?
Refinishing an Adirondack chair usually takes anywhere from 1 day to 1 week, depending on distribution operation time and drying time.
Can I sand without using a power sander?
Yes, but it will take more time and effort. A power sander will remove old paint faster and more evenly, but if you don’t have one, sanding with just sandpaper will get the job done.
How much does it cost to refinish a Adirondack chair?
The cost to refinish an Adirondack chair can range from $100-$200 or even more, depending on the repair the chair needs.
Is it cheaper to refinish Adirondack chairs or buy new?
In general, it is cheaper to repair Adirondack chairs than to buy new ones. However, if the damage is severe and the repair cost is close to a new chair, purchasing a new one may be more cost-effective.
How often should I refinish my adirondack chair?
It is recommended that the chair be refinished every 1-2 years, depending on the condition of the chair and the environment in which it is used.